

Step 1: Create landing pages for each of your results
When you're ready to start using Facebook Ads, it's best if you create landing pages for your results on your own website, rather than host them in Interact. That way, you can add your Facebook Pixel and track your custom events.
Don't worry!
We make it really easy for you to redirect your quiz takers to your own landing pages. It will feel seamless for your quiz takers and you won't lose your segmentation abilities.
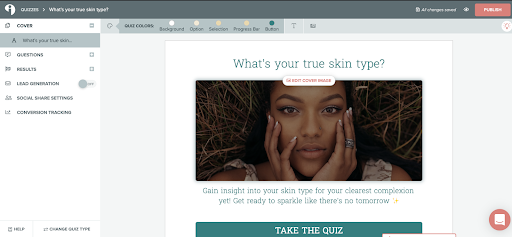
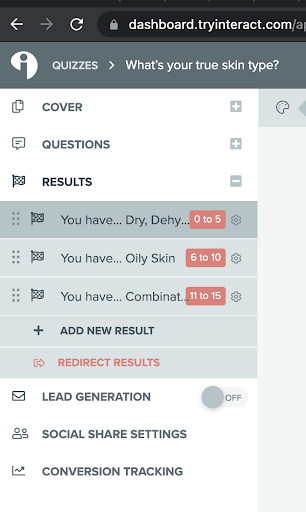
- First, open your quiz in the quiz builder and click on 'Results.'
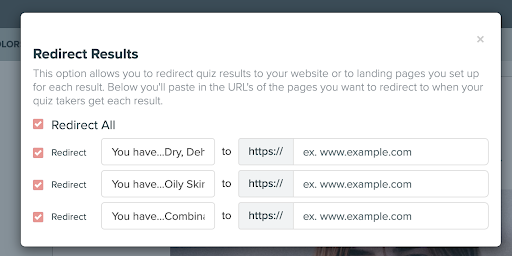
- Then, click on 'Redirect Results.'
- Next, click 'Redirect All' and add your landing page URLs to the space provided.
- Finally, close the pop-up box and hit 'Publish' in the upper right corner of the builder to make your changes go live.
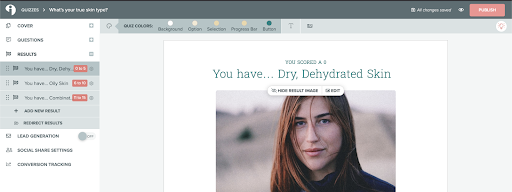
🥳 Ta daaaa! Now your quiz results will redirect to your own website, seamlessly.
Step 3: Set Up your Facebook Business manager
Remember that in the video or screenshots depending on when you are watching Facebook may have changed its interface but you will still be clicking the same things.
You must have a Facebook Business Page set up first. You cannot run ads with only a Facebook profile.
You will need to be logged in with your personal Facebook profile.
If you do not have a Facebook Page then you will need to create one first.
*Business manager and your Facebook page are free to create
*You may have an ad account already but I recommend setting up your Business Manager account because it makes managing your ad account(s) easier.
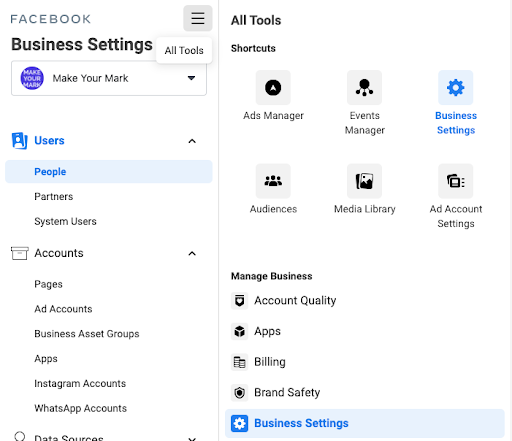
Setting Up Your Business Manager
- Go to Business.Facebook.com.
- Click ‘Create Account’ and follow the instructions.
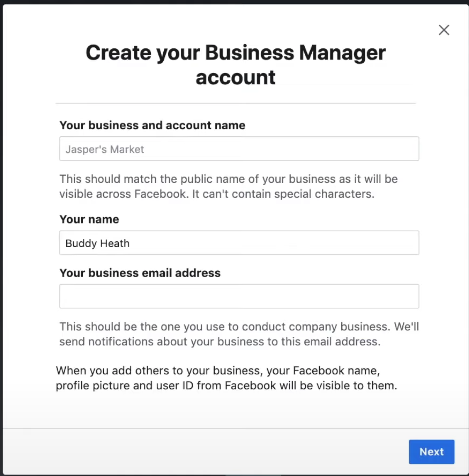
- Name your account
- Add Your Name
- Enter your email address
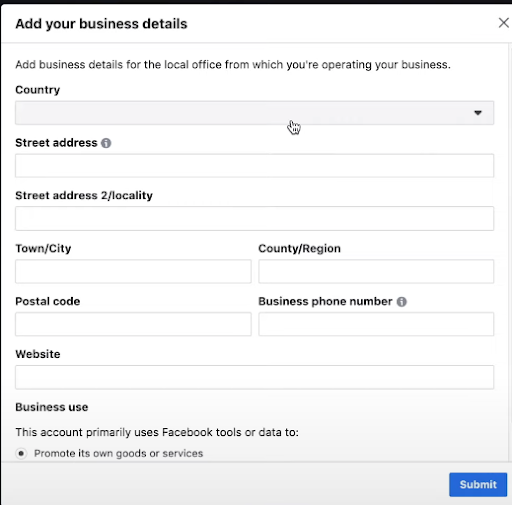
- Add your business details
- Confirm your email address
Yay! Now you have your Business Manager set up!
Adding the Individual Assets

Add Pages
- Click ‘Add Page’
- Click ‘Add Page’ and follow the instructions
- Create a new page if you haven't already created a Facebook Page
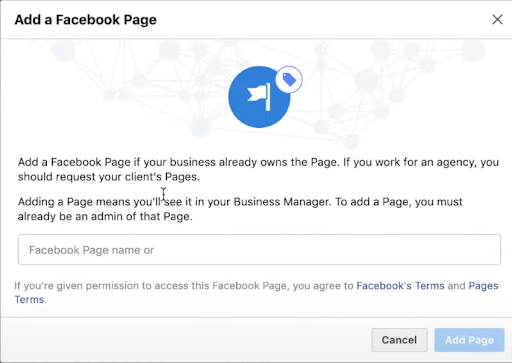
- Or you can request access to another page if you are managing ads or Facebook pages for someone else.
- Create a new page if you haven't already created a Facebook Page
- Click ‘Add Page’
- You will receive an email if you are an admin of that page that your business manager wants access to your page and you will just need to accept it
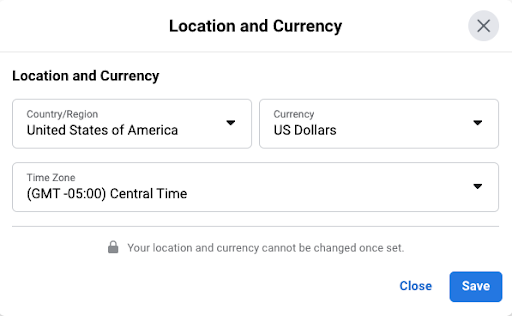
Add an Ad Account Step : Set up your Ads Manager
Make sure you set the Time zone and Currency as you will not be able to change it later.
- Back on the set up screen click 'Add Ad Account'
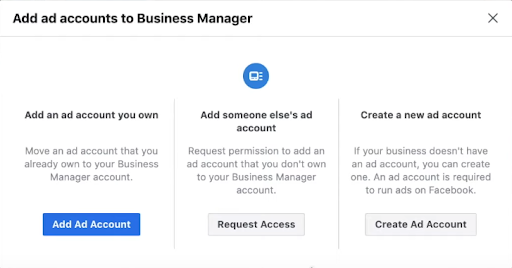
- You can either add your current ad account, request access to one, or create a new ad account
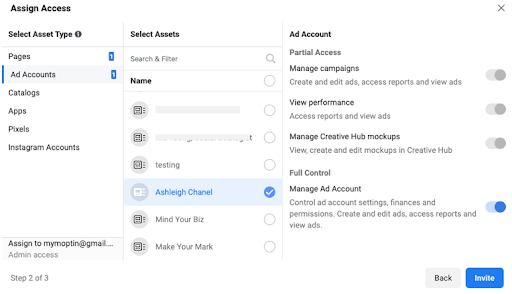
- Click on the 'Person' you want to assign - this would be you
- Click 'Manage Ad Account' under admin access
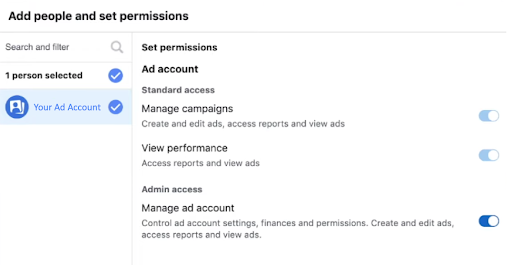
- Click ‘Assign’
- Click ‘Close’
If you already have your business manager set up then follow the steps under 'adding assets'
This is what it looks like to add people and additional assets (Facebook pages, ad accounts, pixels, instagram accounts, etc) to your Facebook Business Manager.
Adding additional assets
You will need to add your pixel, and Instagram account to you as a new person on your business manager.
This is also helpful if you are going to have other people managing your ad account.
- Go to ‘Business Tools’
- Click on ‘Business Settings’
- Click ‘People’
- Click 'Add'
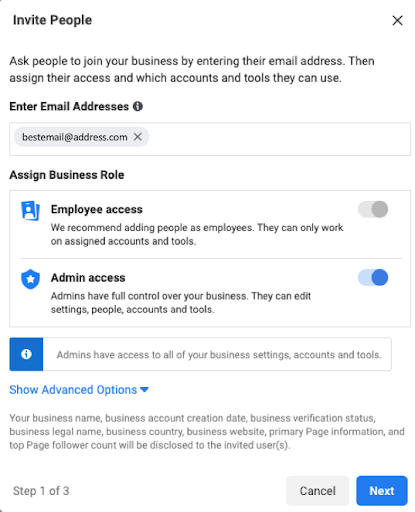
- Toggle the admin access to on (it will turn blue)
- If you are friends you can type in their name. If you are not friends then you can use their email address.
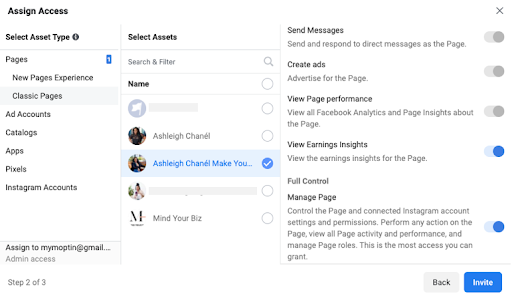
Then you will proceed to add the person to all of the assets you want them to have access to.
Your page, your ad account, your pixel, and your instagram account.
If you have an ecommerce store you can add the catalogs.
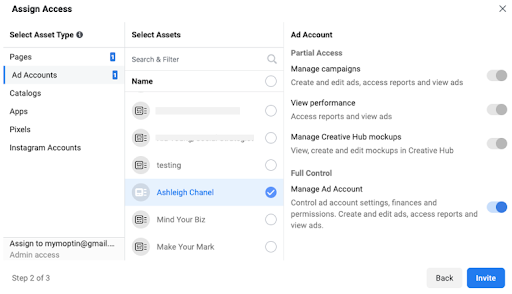
Add a person to an Ad account
Adding your Pixel
![]()
Instagram account
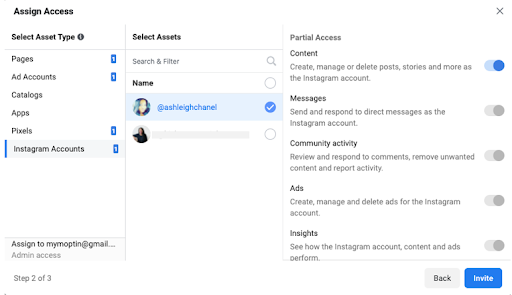
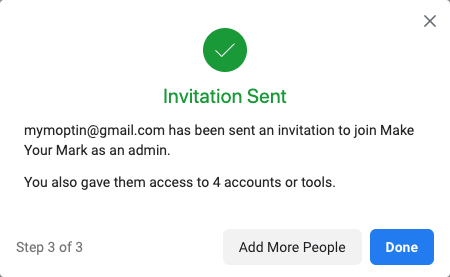
- Click ‘Invite’
- You will receive an invitation

Business Settings
This is what it looks like to add people and additional assets to your Facebook Business Manager.
Add People
This is only necessary if you are going to have other people managing your ad account.
- Go to ‘Business Tools’
- Click on ‘Business Settings’
- Click ‘People’
- Click 'Add People'
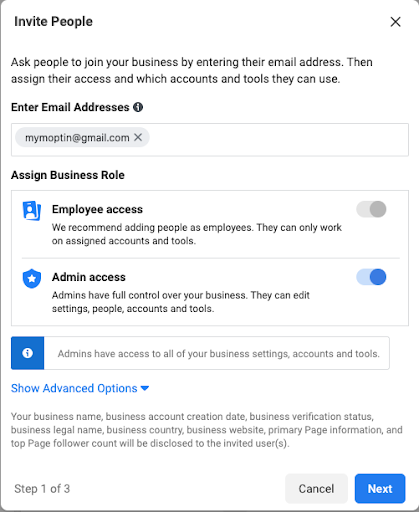
- Toggle the admin access to on (it will turn blue)
- If you are friends you can type in their name. If you are not friends then you can use their email address.
Then you will proceed to add the person to all of the assets you want them to have access to. Your page, your ad account,your pixel, and your instagram account. If you have an ecommerce store you can add the catalogs.

Ad account
Pixel
![]()
Instagram account

Click ‘Invite’ and you will receive an invite in your email inbox.


Add in Your Credit Card Information
You will need to add your credit card information before Facebook will allow you to start running ads.
- Go to ‘Business Tools’
- Then click on ‘Business Settings’
- Next, click on ‘Billing’
- Click on ‘Add Payment Method’ if you have a brand new account.
- Click on ‘Payment Settings’ if you need to update your billing for your existing account.

- Click ‘Add Payment Method’
- Enter your payment information
- Make sure the location and currency is correct
Step 4: Add a pixel to your website
What is a pixel?
A Facebook pixel is an analytics tool in the form of a piece of code that you embed on your website or landing pages.
You use it to measure results of your ad campaigns, drive sales, and make sure your ads are shown to the right people.
Why do you need it?
Simply put you use a Facebook Pixel to track the people who engage with you on Facebook, Instagram, and your website. 'allows you to measure the effectiveness of your advertising by understanding the actions people take on your website.'
A Facbook Pixel allows you to create specific audiences based on how they interacted with your Facebook pages, Instagram profiles, or websites. It also helps you 'find new customers, or people who have visited a specific page or taken a desired action on your website.'
Install the Facebook Pixel Helper Chrome Extension to make sure your pixel is installed correctly.
Creating the Pixel
*Note - You can create multiple Facebook pixels. Not necessary unless your businesses or websites are completely different and serve different audiences. But you cannot delete any pixels.
You also must create a pixel under your business account. You may have run ads under your personal account previously.
Right ✅
Wrong ❌

Create your pixel
- Go to ‘Business Tools’
- Click on events manager
- Hover over the left side bar and click on the green plus sign
- Click web
- Click get started if your account is new
- Click Facebook Pixel
- Click connect
- Name your pixel
- Add your website
- Click continue
- Click partner integration if your site is a partners with Facebook
- Click Install manually if your site is NOT partners with Facebook
- Install code base. Once you copy the code it will turn green and you can click continue
- Insert the code in the <head> section of your website. Your website provider (wordpress, shopify, kajabi, lead pages, etc.) will have a place for you to put the code. Sometimes you may just need to insert the numbers of your pixel id.
This is what the code looks like.
<!-- Facebook Pixel Code -->
<script>
!function(f,b,e,v,n,t,s)
{if(f.fbq)return;n=f.fbq=function(){n.callMethod?
n.callMethod.apply(n,arguments):n.queue.push(arguments)};
if(!f._fbq)f._fbq=n;n.push=n;n.loaded=!0;n.version='2.0';
n.queue=[];t=b.createElement(e);t.async=!0;
t.src=v;s=b.getElementsByTagName(e)[0];
s.parentNode.insertBefore(t,s)}(window, document,'script',
'https://connect.Facebook.net/en_US/fbevents.js');
fbq('init', '70958360823392446');
fbq('track', 'PageView');
</script>
<noscript><img height='1' width='1' style='display:none'
src='https://www.Facebook.com/tr?id=70958360823392446&ev=PageView&noscript=1'
/></noscript>
<!-- End Facebook Pixel Code -->
IF YOU JUST NEED YOUR PIXEL ID You can find your pixel within the code as highlighted in red below.For your specific website provider please google (install Facebook pixel 'NAME OF YOUR WEBSITE PROVIDER') EX: install Facebook pixel leadpages
*If you use wordpress you can install a plugin called Insert headers & Footers
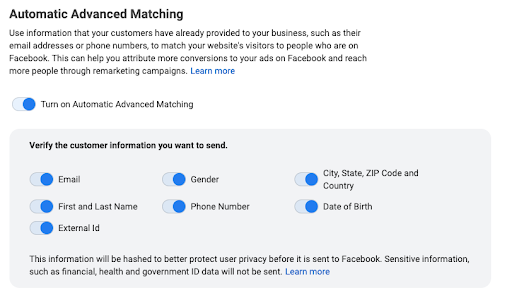
- Toggle on Automatic Advanced matching so that Facebook can recognize people who come to your site.
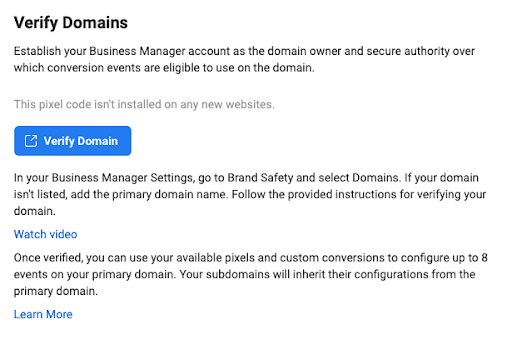
Step 5: Verify Your Domain
IMPORTANT NOTE* You can ONLY verify URLs that you own. You cannot verify leadpages, kajabi, kartra, teachable. etc. Those sites MUST have your URL attached to them for you to utilize your custom conversions.
If you are setting up your business manager for the first time for the first time click Verify Domain
If you have your business manager set up already follow these steps:
- Business tools
- Click Business Settings
- Click Domains
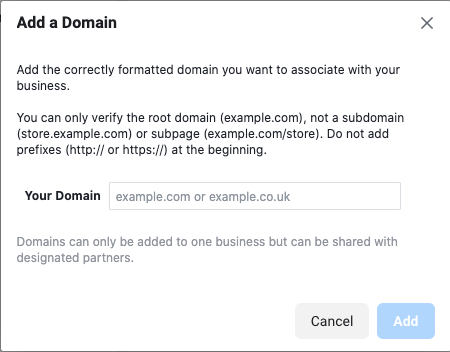
- Click 'add'
- Enter in the Domain that you own
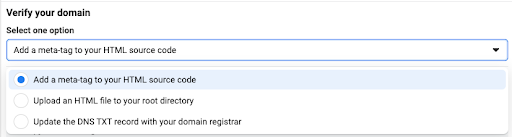
- Add the HTML code OR DNS record to your site. You only need to do one of these
To verify your domain with the HTML code click 'Add a meta-tag to your HTML source code' dropdown
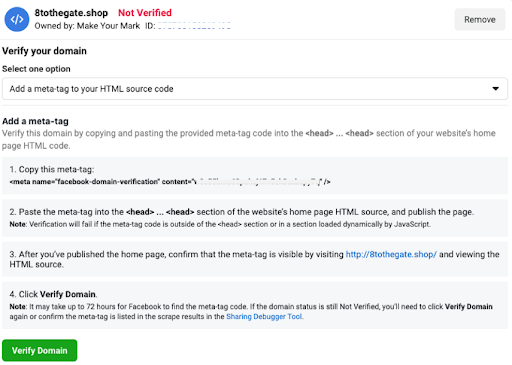
Add the code to the <head> section of your website
*google where the head section of your website is (leadpages, wordpress, shopify)
Copy the meta-tag
paste the tag into the <head> section of your websites home page. If you use wordpress you can use a plugin called 'Insert Headers and Footers'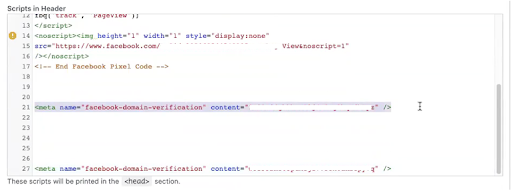
Come back to your business manager and click 'Verify Domain'
To verify your domain with your domain or hosting provider (wherever you purchased your domain -- godaddy, name cheap, siteground, etc.)
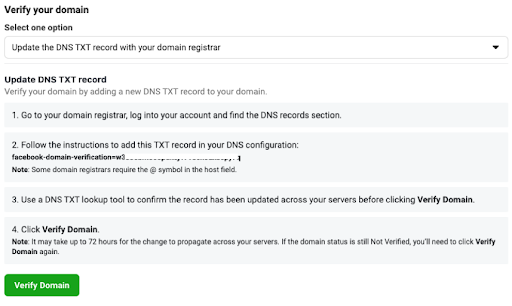
click 'Update the DNS TXT record with your domain registrar'
Login to your domain registrar. In this example I will be using godaddy
Find your domain
Click on manage DNS
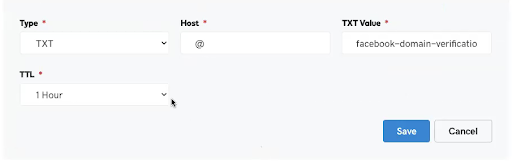
Add the TXT record
Come back to your business manager and click 'Verify Domain'
Step 6: Create your custom conversions
What is a custom conversion
Custom conversions are a way to track very specific events on your website with your Facebook pixel. Like people completing your quiz AND getting to your results pages.
Custom conversions must be set up for your ads to be successful.
You are telling Facebook who you want your ad to be shown to and what you want your audience to do. Purchase, subscribe to your lead magnet, finish your quiz, etc.
You can only create custom conversion of websites that you own.
If you want your audience to finish your quiz your custom conversion will be ALL of the URLs for your results pages.
How to set up your custom conversions
- Business tools
- Events manager
- Hover over the left side and click on custom conversions
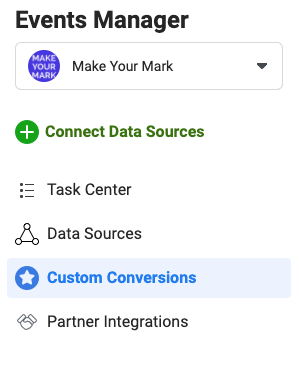
- Click create custom conversion
- Name Your custom conversion in a way that keeps you organized and makes sense for the destination
- Make sure the data source is your actual pixel
- The conversion event is All URL Traffic
- SKIP select your own category
- Under Rules - make sure it says URL + Contains
- Insert ALL of the URLs for your results pages
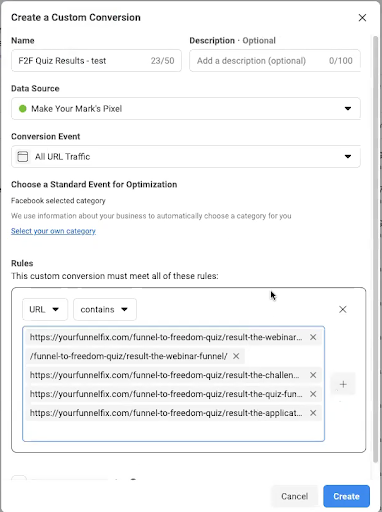
- SKIP conversion value
- Click create
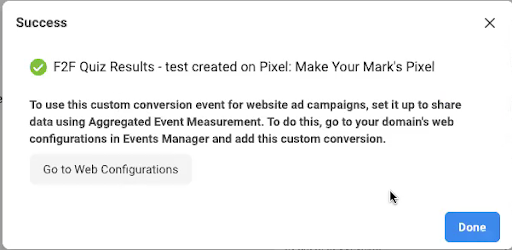
- Click done
-
You will notice it says inactive and no recent activity
In order to activate your custom conversion just go to your quiz URLs and refresh the pages. That is all it takes to activate the custom conversion.

Step 7: Aggregate Your Conversions
Here’s the deal: aggregating your conversions is how you can make sure that your ads will get shown to the people who engage with your brand → even IF they opted out of being tracked in the September 2021 IOS update from Apple.
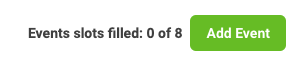
You used to be able to have as many custom conversions as you want, but these days Facebook only allows you to have 8 of them. So, when you aggregate your conversions, it helps Facebook to prioritize what you want to put in front of people.
Here’s how you aggregate your conversions in Facebook:
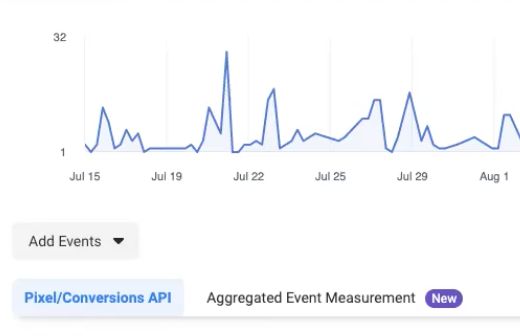
- Hover over the left side menu and click on data sources
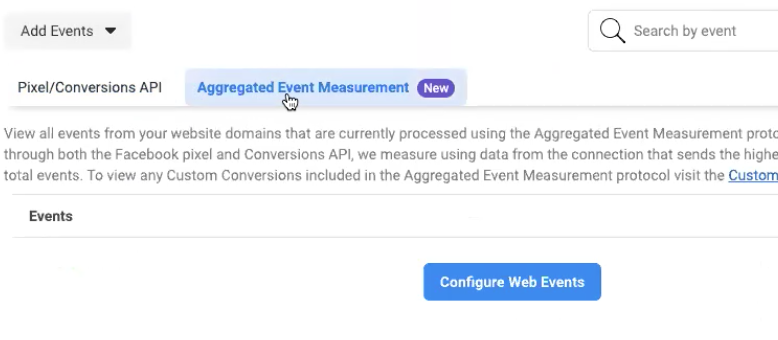
- Click on 'Aggregated Event Measurement'
- Click on Configure Web Events
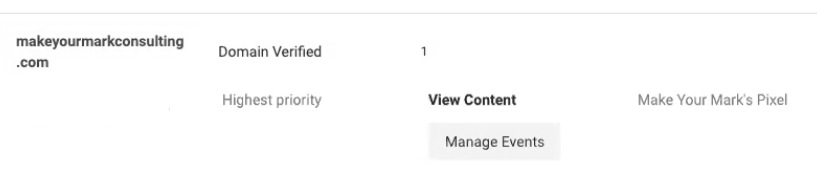
- You will see your domain
- Click the dropdown arrow
- Click ‘Manage Events’
- Click ‘Edit’
- Click ‘Add Event’ (remember: Facebook will allow you to use 8 conversions at a time. So choose conversions that are important to you.) These are not set in stone. You can always change them.
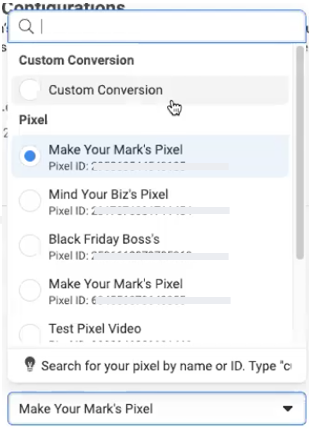
- Choose custom conversion from the the 'Pixel or Custom Conversion' drop down
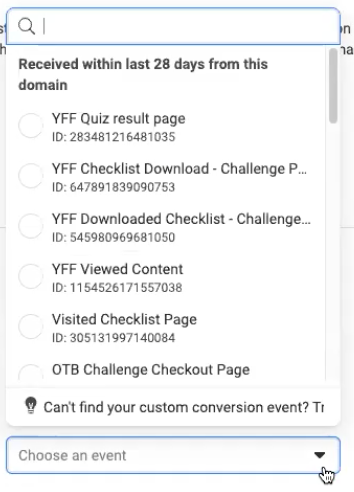
- Choose your event - choose the custom conversion you just created
- Click ‘Submit’
- You have to move the conversion you want to happen to be your highest priority (move to the top) to ensure you get the results you want.
At this point you may only have one conversion created so you don't need to take any other action. But say you have a new offer and you want to get purchases more than you want people to take your quiz -- then you would move the conversion up higher. - Confirm the changes
- Click ‘Apply’
- Click ‘Okay’


Step 8: Create your ad
Again please note that Facebook changes the interface periodically. But the steps will be the same even if the screen shots or videos in this course look different.
Creating your ad
- Go back into your ‘Business Tools’
- Click on your ‘Ad Manager’
- Then click ‘Create’
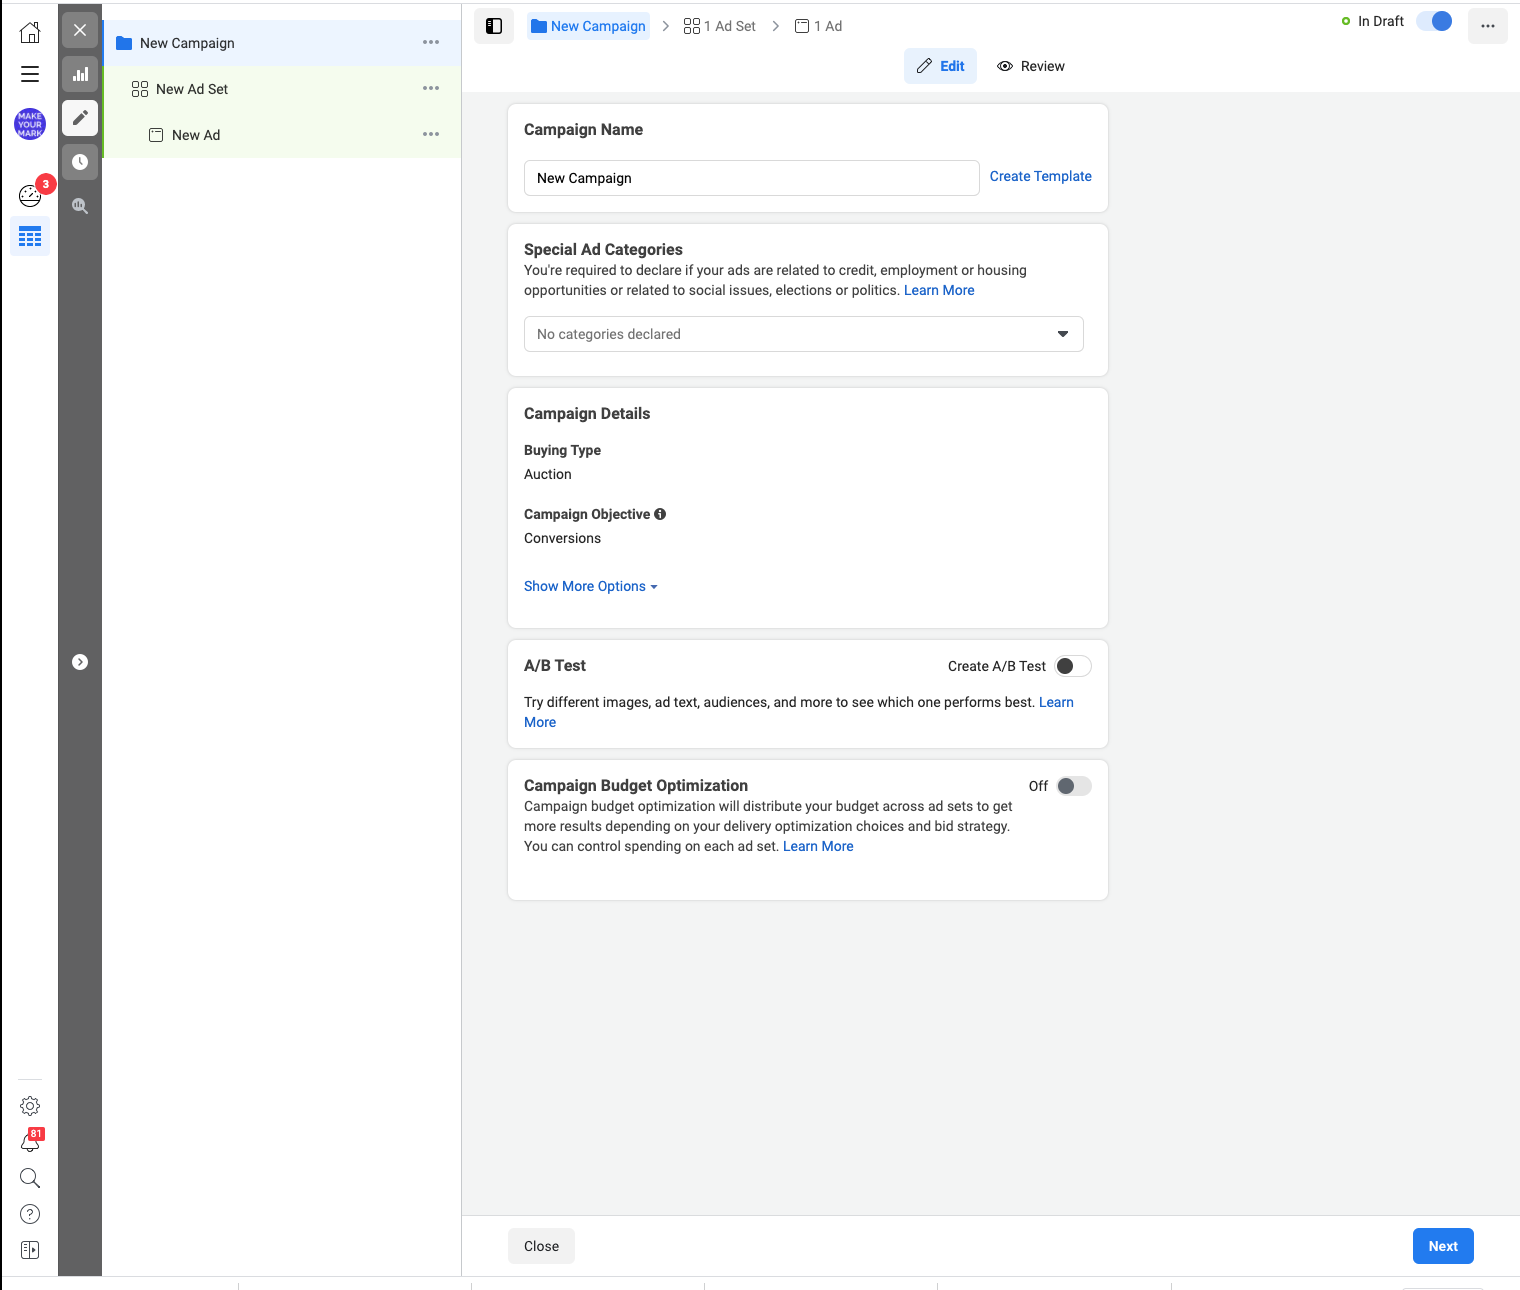
Make sure 'Create New Campaign' is selected and choose your campaign objective. This will walk you through creating a conversion campaign. - Click ‘Conversions’
- Click ‘Continue’


Set up your ‘Campaign Level’
- Name your campaign. The naming convention I use is 'Title of what I am selling + Objective.' Of course, you can create your own conventions, just make sure you’ll be able to recognize your ad set and feel organized.
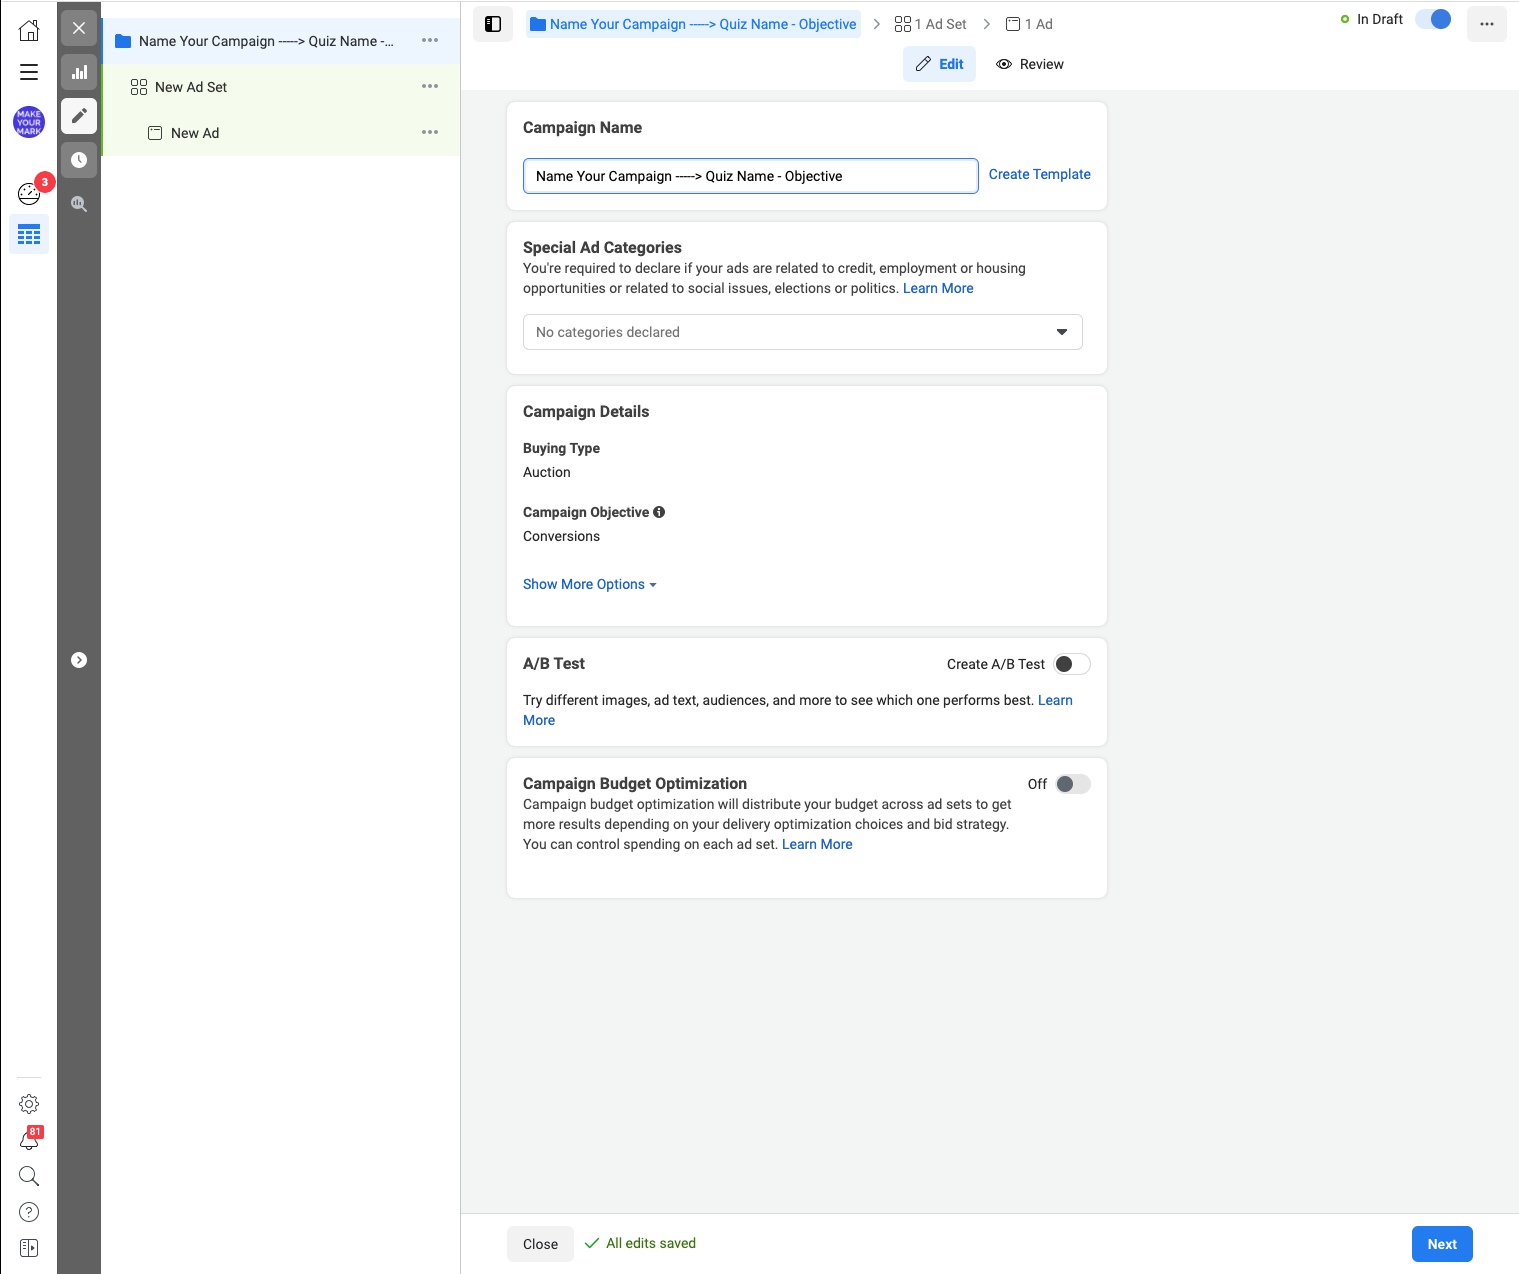
You only need special categories if you are within these categories.

You do not need to touch anything else on this page.
Skip the campaign details, A/B test, and Campaign budget Optimization.
You will set the budget on the ad set level.
2. Click ‘Next’
Set Up Your Ad Set Level
**Please note that if you choose a traffic campaign (I recommend a custom conversion campaign, not a traffic campaign), make sure to optimize for ‘Landing Page Views’ on the ad set level.
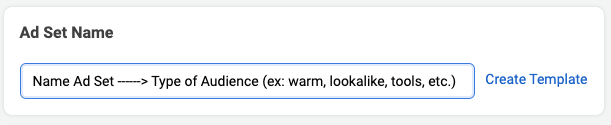
- Name the ‘Ad Set’
Name the ad set using the audience you plan to target (ex warm audience, lookalike, tools, moms 18-35, etc.). It makes it easier to read your analytics and determine which ad set is working best. - Choose your conversion event
Under conversion make sure ‘Website’ is selected - Click inside the box and your events will pop up
- Scroll down until you find the custom conversion you created
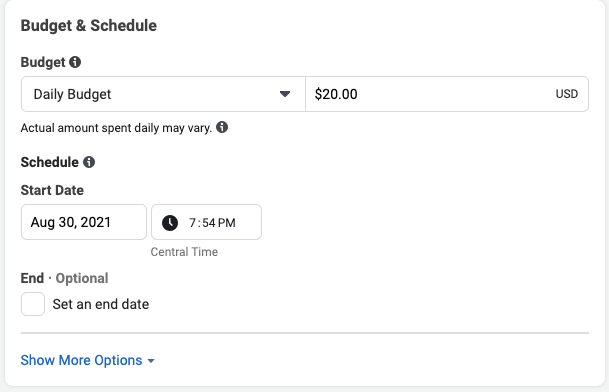
- Set your budget
I recommend $10 per day ($300 a month) PER ad set with no more than 4 ads in each adset.
At the least I recommend $5 per day ($150 a month) PER ad set with no more than 1 ad in each ad set.
Once you see more data, like what your cost per click (CPC), Cost per lead (CPL) or cost per acquisition (CPA) are, you will be able to determine how much you need to spend to acquire a lead or sale.
Cost per click (CPC) can be found in your Facebook Analytics.
Cost per lead (CPL) formula
Cost per lead is how much it costs you to acquire an email address from your quiz (or ad campaign)
Cost Per Lead = Total Amount Spent ÷ Total attributed Leads/email subscribers
Cost per Acquisition (CPA) formula
Cost per acquisition is how much it costs for you to acquire a sale from your ad campaign
Cost Per Acquisition = Total Amount Spent ÷ Total attributed Conversions/Sales
You don't need to touch the date unless you want your ads to start and end. (Sometimes if you take too long creating your ad Facebook will tell you to change the time to the current time instead of when you started the ad.)
- Select your audience


When choosing your interests for Facebook ads you want to be as specific as possible to get in front of your ideal humans.
You can add detailed interests, or select a saved audience, select your look alike audiences, or select your custom audiences (for retargeting) that you created. If you select custom audiences you don't want to select gender, sex, or add any detailed targeting interests.
Example: You sell knitting kits for beginner millennial knitters on Etsy.
You may type in:
- Knitting
- Crochet
- Fabric Art
But, to get more specific to your audience you will want to focus on:
- Tools they use → Knitting needles, Ravelry, Yarn
- Brands they use in your genre → Chiagoo, Basic Stitch, Bernat
- Authors & Gurus → @dreareknits, @knitwoollove
- Celebrities → Tom Daley, Zooey Deschanel
- Music choices → 90s hip hop, ambient house, Taylor Swift
- Entertainment → Netflix,
- Business Industry → Crafting
- Hobbies → Sewing, knitting, prepping

Hover over Location, Age, or Gender to edit

Detailed Targeting
Type in targeting that is relevant to your audience, business, and what you are selling.
Then click on it.
You can hover over your interest to see how many people are in that particular audience. This helps to determine your potential reach.
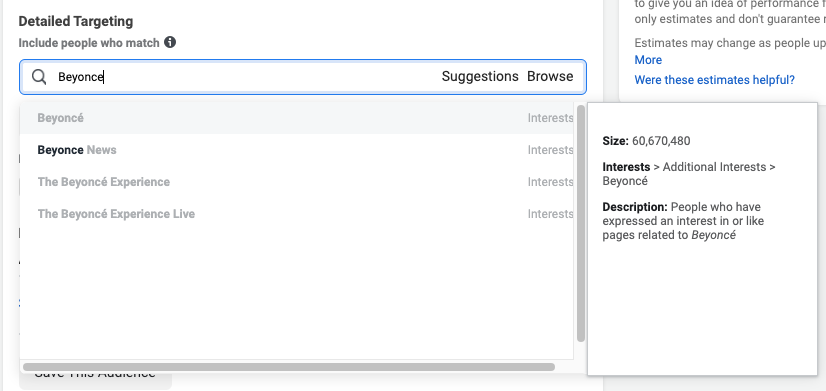
If you need a little help you can click on suggestions and related interests will be revealed.

You can also browse topics based on Demographics, Interests, and Behaviors

Because of the September 2021 iOS update, you may want to test checking the 'Detailed Targeting Expansion' box.
Choose one ad set with it checked and one ad set (same audiences) without it checked.
This way, you can see which does better.

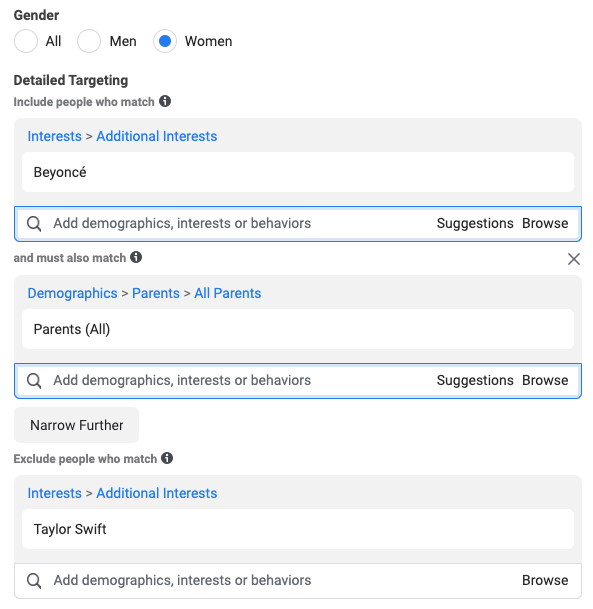
Narrowing & Excluding Audiences
Example: You may want to only target Moms who like Beyonce
So your targeting would look like this:

Or you may want to target Moms who like Beyonce but exclude the women who like Taylor Swift.
Your audience would look like this:
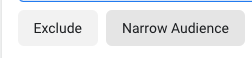
Narrow Your Target Audience
Choose new targeting details to refine your audience from the people included above.
Pro tip: Adding the first option will decrease the size of your audience, and then each new option will increase the size from there.

Exclude:
Choose new details to exclude people from the audience included above.
Pro tip:
Each new option will decrease the size of your audience.

Audience Definition

This shows you how many people you have the potential to reach.
When you are testing audiences and ads you will want to keep this number between 1 million and 5 million. Once you are ready to scale (increase your budget when you find the ads that are working) you can go into 30 million or more.
This number will vary depending on the country you target. New Zealand will be significantly less.
Pro tip: Keep Automatic Placements checked until you feel comfortable testing the different placements
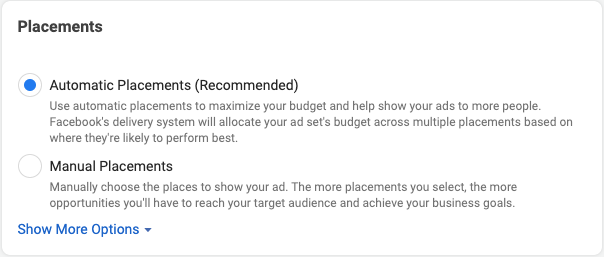
Automatic Placements will place them everywhere below
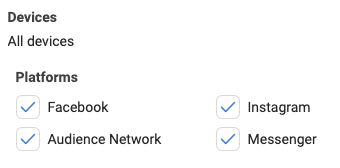
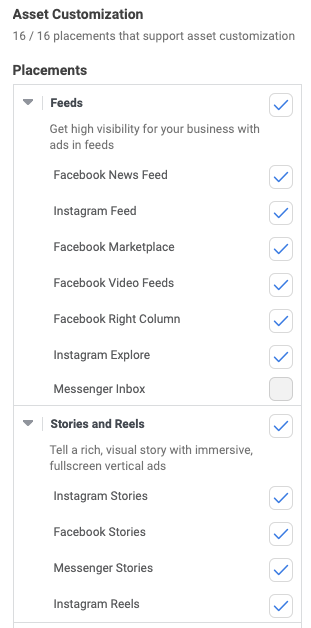
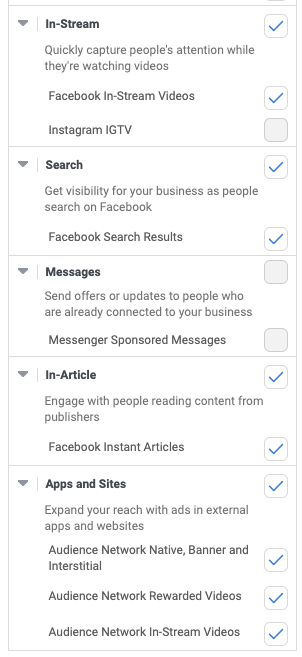
When you change to manual placements you can uncheck any placements you don't want.
You don't need to touch anything in optimization & delivery

Set Up Your Ad Level
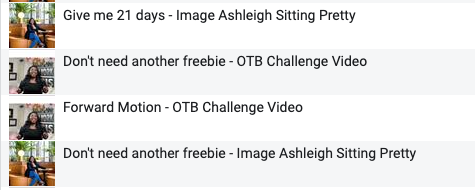
- Name your ad. I name my ads with what is going on in the image or video. You can choose to name your ads whatever you like, but make sure that it will make sense to you in the future.

Examples:

2. Choose your Facebook page and Instagram Account
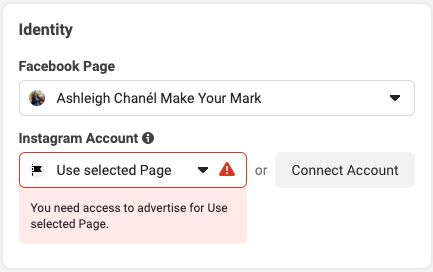
Like so:

You can either Create an ad or use an existing post from your Facebook page or Instagram account. If you choose to use an existing post you will not be able to change anything about the ad because it populates everything from your posts.
3. Click ‘Create Ad’
4. Click ‘Standard’
5. Choose the Format you plan to use. In this example we will be using ‘Single Image or Video’

6. Click Add Media. You can either upload an image or video you currently have:
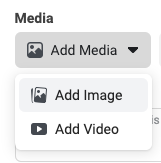
Or ‘Create a Video’ using Facebook.

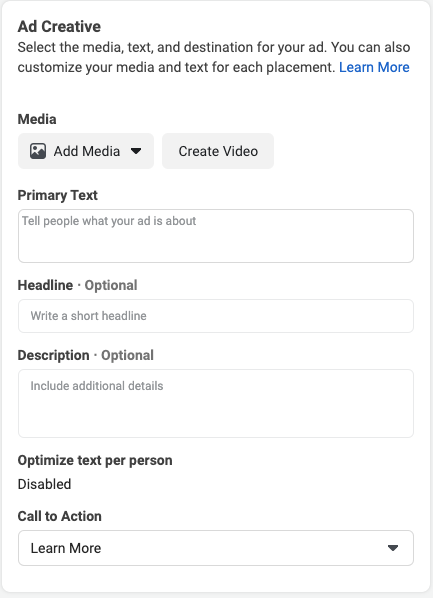
7. Insert your ad copy (text) into Primary Text
8. Insert your headline
9. Add a description -- it will show in certain placements
10. Choose your call to action. Choose the one that makes the most sense for you.

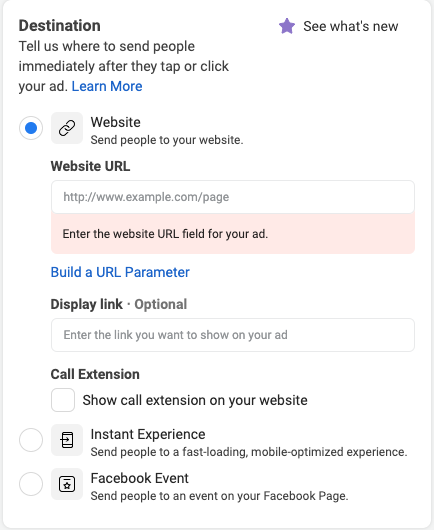
11. Insert your URL of your quiz landing page inside the 'Website URL' section. You can also Insert a display URL IF
you don't like how it shows up
12. SKIP call extension, instant experience, and Facebook event
13. SKIP Languages
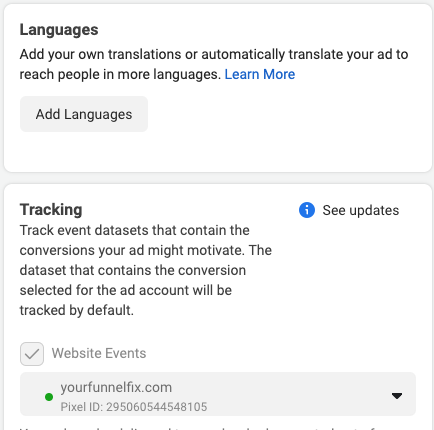
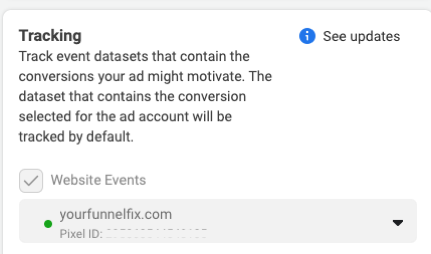
14. Make sure the correct pixel is selected
15. Click ‘Publish’

YAY! Your ad is done!
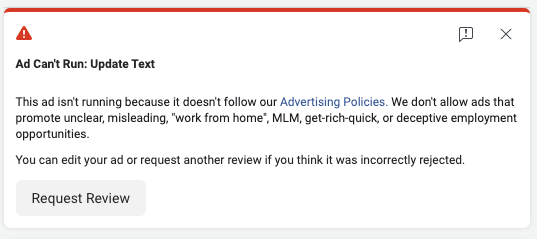
Step 9: What to do if your ad gets rejected
- Check the Facebook Ad Policies to make sure that you aren't violating any policies with your wording or images/video
- Then appeal the decision by going into your ads manager and clicking the box next to your campaign
- Next, click the 'Ads' tab, then click 'Edit Your Ad.' This is where you'll see the reason your ad was rejected. Chances are, it'll be pretty vague
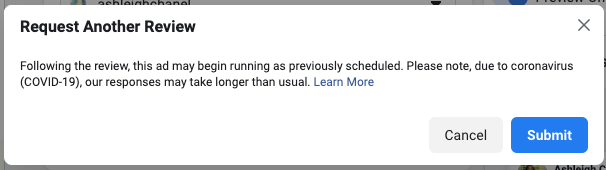
- If you KNOW that your ad does not violate any policies then go ahead and click 'Request Review.' If you aren't completely certain then go review the policies.
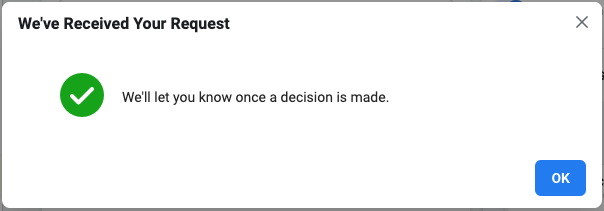
- Once you're certain your ad doesn't violate any policies, click 'Submit,' then click 'Okay'
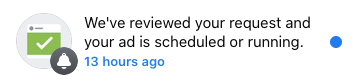
Eventually, you will get a notification with the appeal decision - If your ad gets denied again try changing the text or the creative you used
Under prohibited content and restricted content be sure to click 'Learn More' under any section and it will show you every section.
Some of the sections have additional content and will allow you to click here.
Example for #2 under restricted content - Dating Ad Restrictions
Facebook is pretty sensitive so read over the policies and familiarize yourself with the do's and don'ts.
Not doing so can result in you getting your ad account shut down for good.
Their policies help you get creative with your copywriting :)
DO NOT skip this step. You will be very frustrated if your ad gets rejected for the slightest 'off' wording

Step 10: How to read your ad results
Numbers to pay attention to
- CTR (Link Click-Through Rate) - shoot for a 1% click through rate or more. Usually with a warmer audience or really good Lookalike audience your CTRs will be higher.
- CPC (Cost per Link Click) - the lower the better. But this will depend on your audience and your business. For a quiz you can be anywhere from $1 to $7. If you have an offer on the landing page of your quiz results or you have an email sequence selling them something then your ad costs will be liquidated by your sales.
- Results - how many leads are you getting from your quiz
- Landing page views vs results (or look on interact for your analytics)
- Frequency - how many times they are seeing the ad before they take action. For anything other than a retargeting ad set I like to keep the number under 2 and as close to 1 as possible. If they have to see the ad more than 4 times then you may want to evaluate the copy and design to make it more compelling and effective.
*Pro Tip
You can set up your columns the way you want them by clicking on the columns button then clicking customize columns.

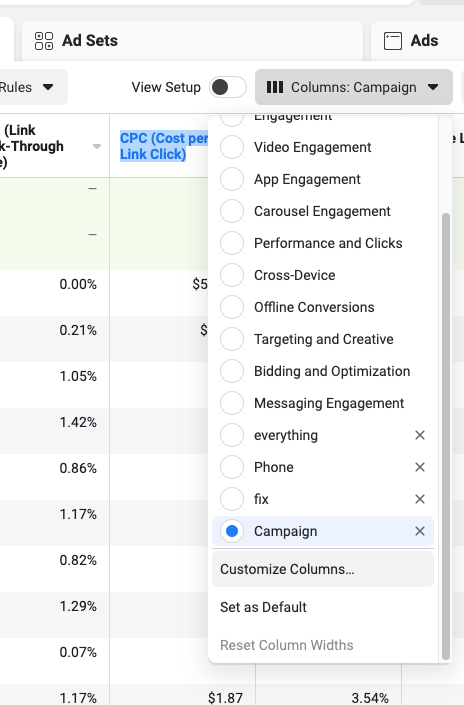
Make sure to uncheck anything you don't want to see and go through and check what you want to show up in your columns.
It makes it easier to read your results.

Step 11: How to optimize your ads
When making changes to your ad make sure you only change one thing at a time. Otherwise you won't know what change made the difference.
- If they aren't clicking then your ad is not resonating with your audience. This means your audience could need tweaking or your ad copy or creative needs to be switched up.
- If they are clicking and not starting your quiz then either your ad and the landing page for your quiz has a disconnect or your quiz title, premise, image, or description may need some work.